LMM CONTROL
CID1201 (MLC121BT) INSTALLATION GUIDE for Windows 10

1
Table of Contents
Installation of LMM Control Application....................................................................................................... 2
Network Configuration ................................................................................................................................ 6
Troubleshooting ......................................................................................................................................... 10
The instructions detailed is the manual are for the installation of the LMM Control Application on to a
Windows 10 PC only.
© EIZO 2020

2
LMM Control Application Installation Guide for (CID) Windows 10
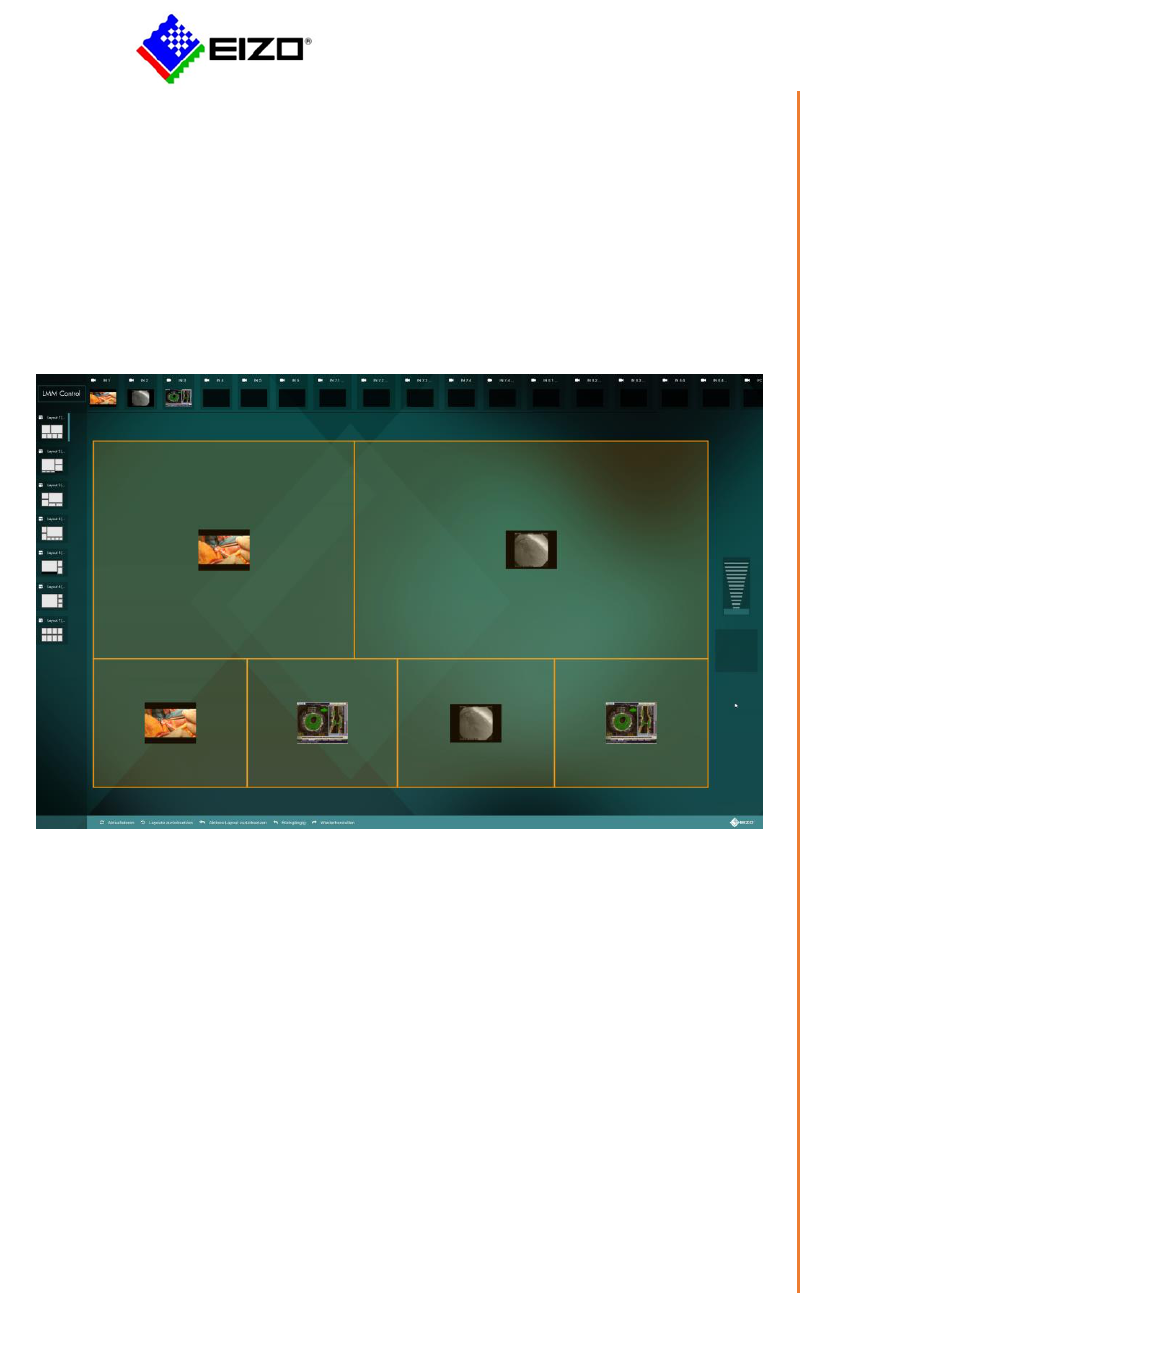
1. Prepare a Windows 10 PC operation.
2. There are two files required to be installed; the jre folder and LMMControlLoader application.
(Image 1)
3. After downloading the two files on to a USB Drive place the LmmControlLoader and the jre folder to
the Windows Program Files. (Image 2)
Image 1
3
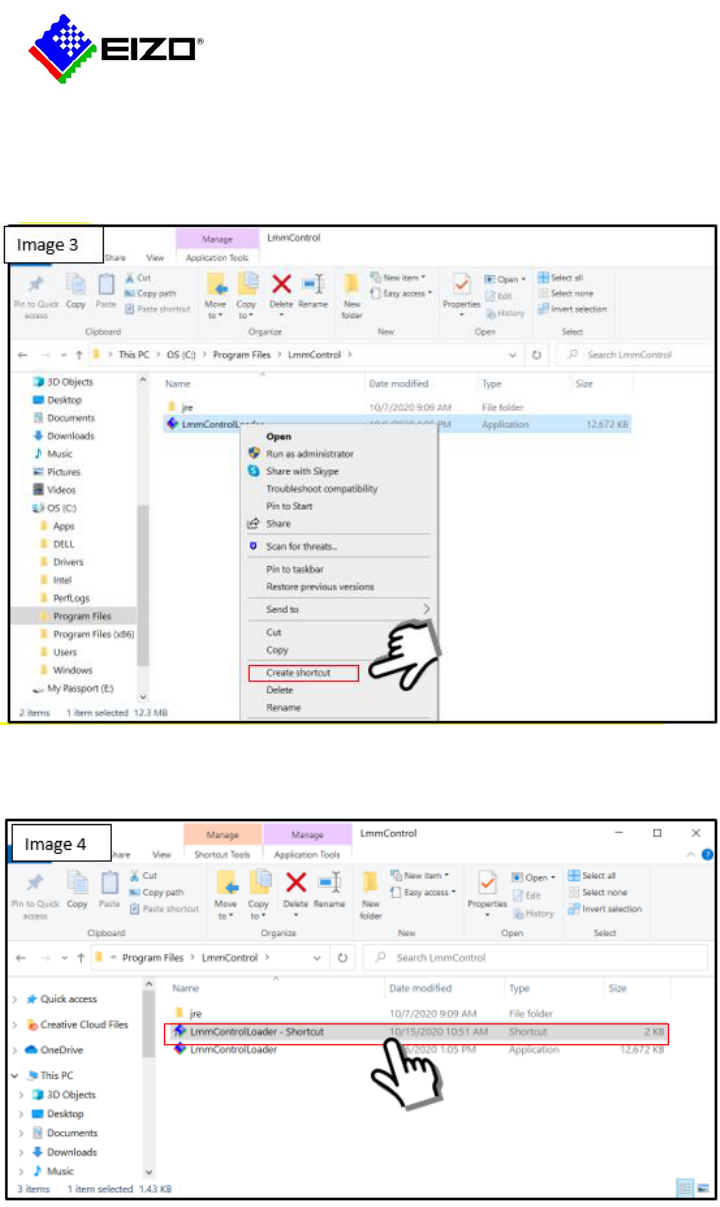
4. Create a shortcut of the LMMControlLoader by right clicking the mouse, select Create shortcut.
(Image 3)
5. The shortcut is now created. Copy (right click mouse to copy). (Image 4)
*Copy this shortcut to desktop to enable launching of the application manually. To automatically open
application when PC is turned on, follow steps 6-8 by placing the shortcut in the Windows Startup
folder. To not run application automatically skip these steps.
4
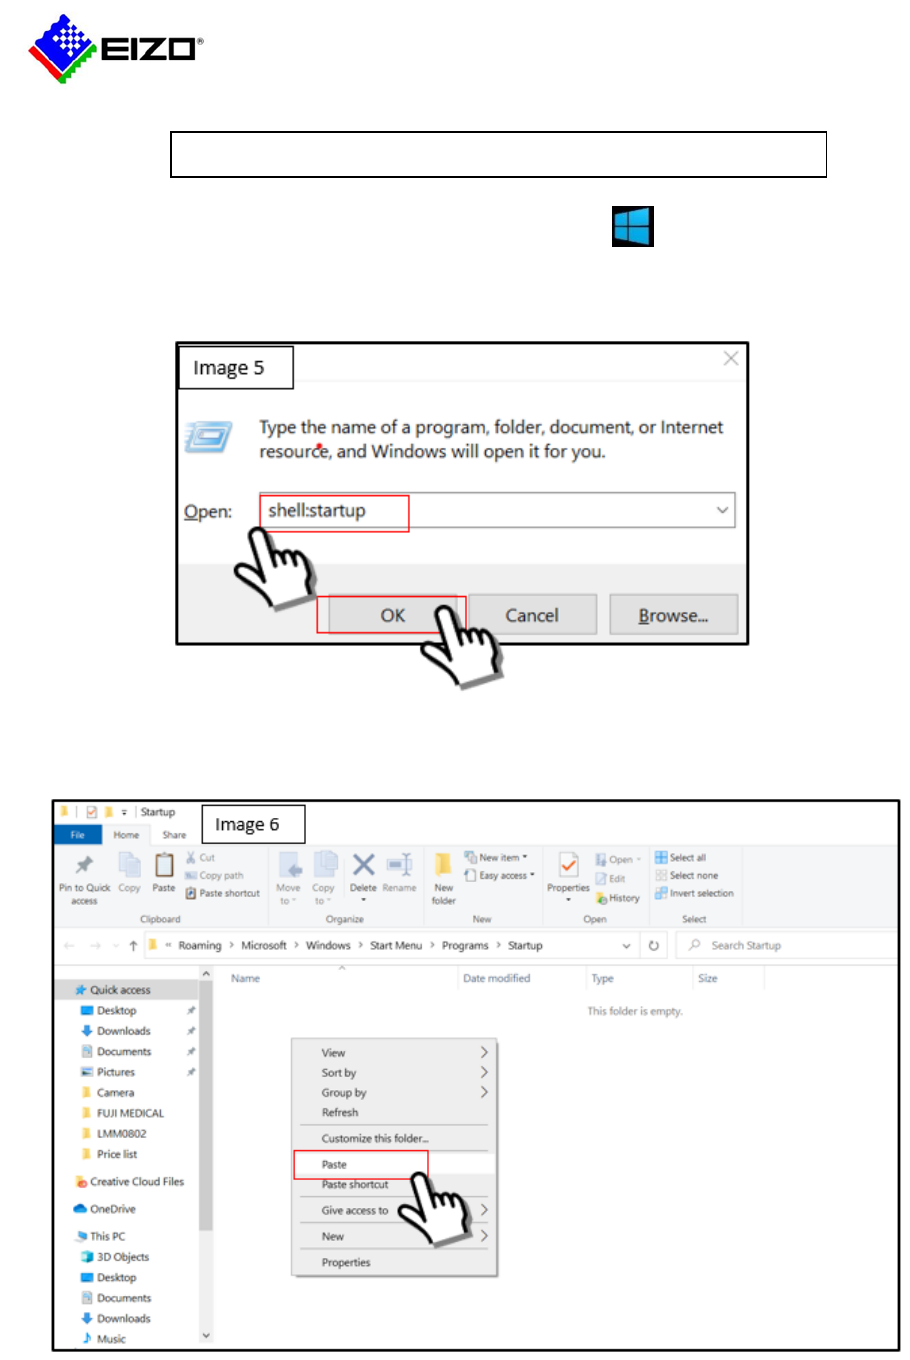
6. Open the Windows Startup folder by pressing the Windows key and the R key. The window
below will appear. (Image 5)
Type shell:startup then select OK.
7. The startup folder will open. Right click the mouse to Paste the LmmControlLoader shortcut into this
folder. (Image 6)
Setting up the PC to automatically run the LMMControlApplication
5
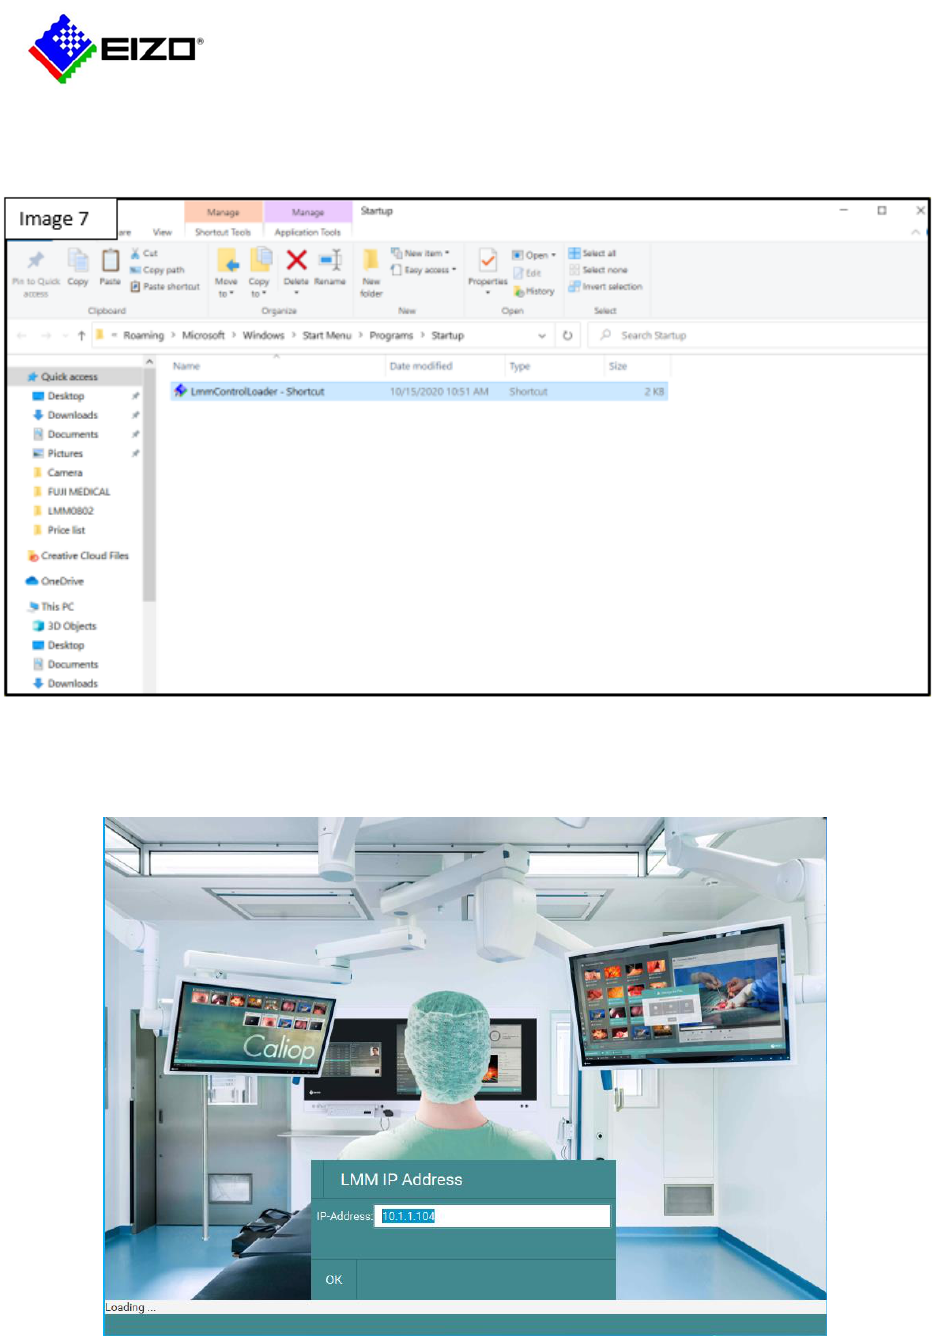
8. The shortcut is now in the startup folder as shown in the screen below. (Image7)
9. Restart the PC. The LMMControlApplication will automatically launch. Hold the shift key down as
soon as this screen appears. Then input the IP address.
6
Network Configuration
For the Windows 10 hardware to communicate to the LMM0802, the IP address on the host machine
must match the same IP network range than the LMM0802. If DHCP is used on the host machine, a
connection can be established to the IP address that has been assigned to the LMM0802 by the DHCP
protocol.
The default standard address is 10.1.1.104 which is pre-configured on any new setup. This is an IP
address is recommended to access the LMM by using this address. If another address shall be used, it is
changeable in the “Network settings” dialogue to any valid IP format. Also, the “dynamic host
configuration protocol” (DHCP) is supported for this address.
The service IP address is hard-coded 169.254.213.144 and cannot be changed. The LMM0802 is always
reachable under this IP. It is usually used for fallback connections if the primary IP address is not
reachable and shall not be used for the application.
Setting the IP network address of the Windows 10 hardware to the same subnet of the LMM0802.
1. Press the start button on Windows 10
2. Select the settings icon
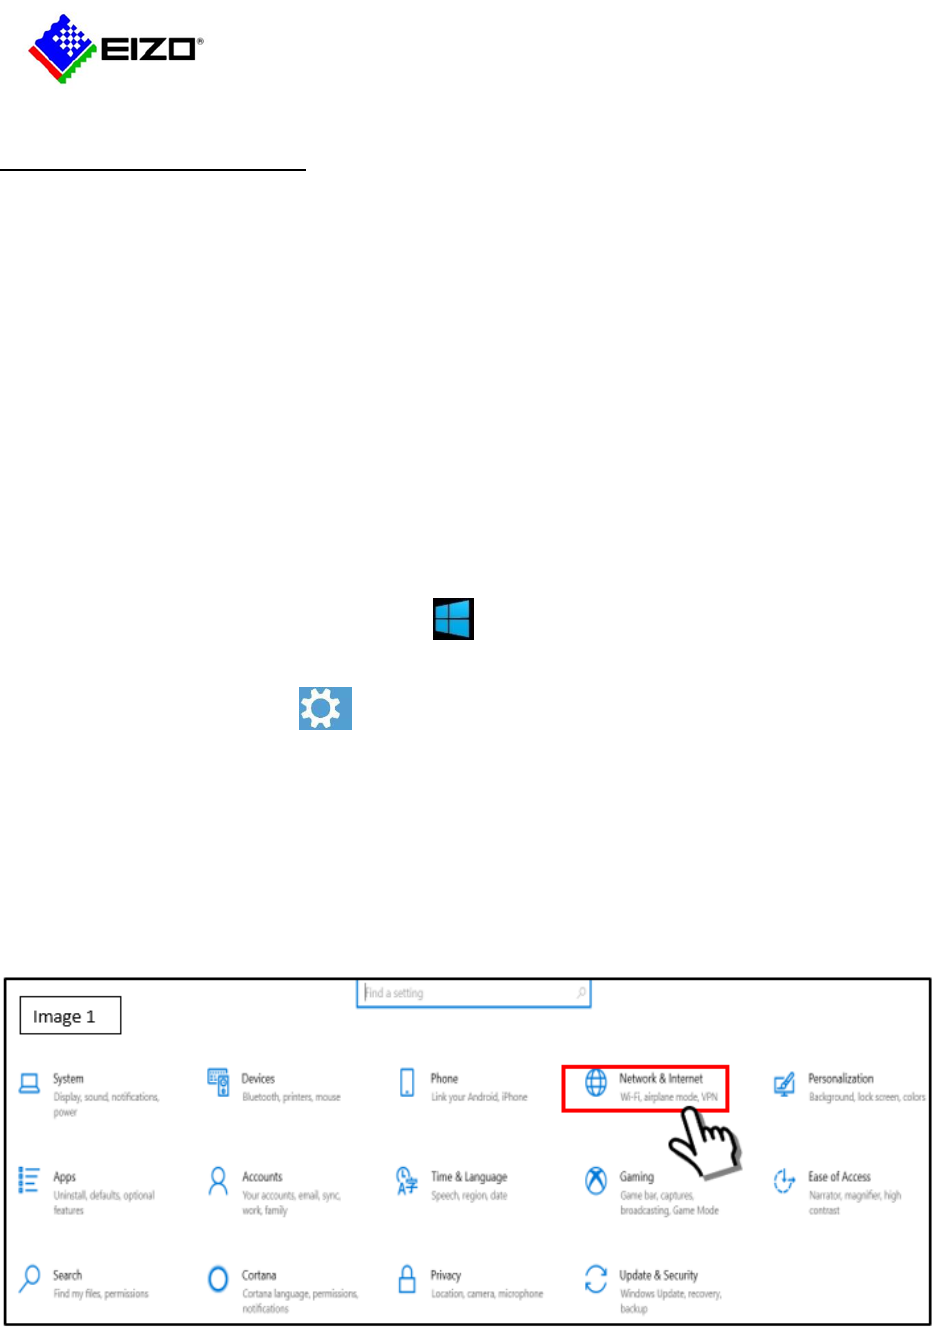
3. Windows 10 settings will appear. (Image 1)
4. Select the Network & Internet.
7
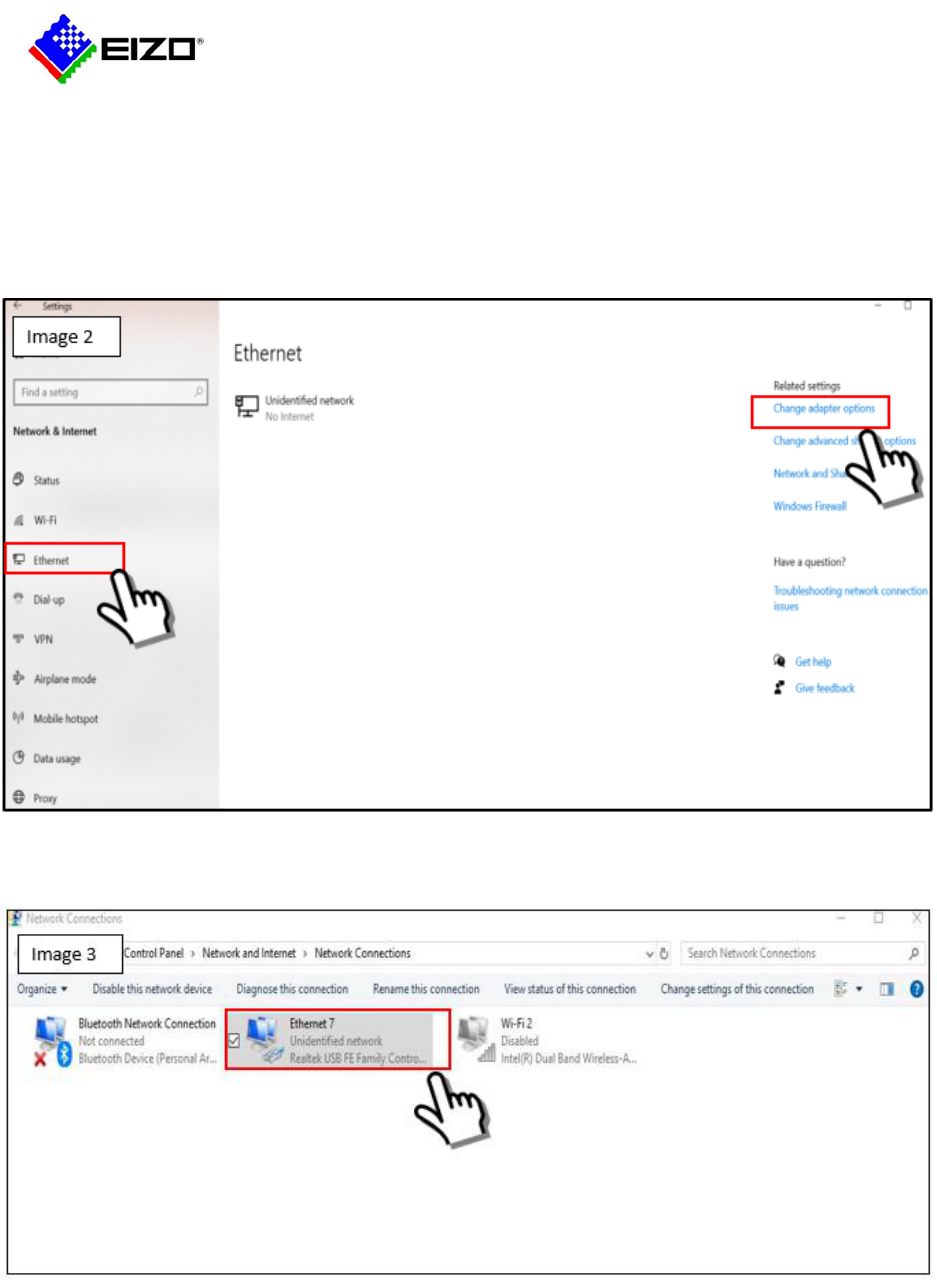
5. Network status window opens. (Image 2)
6. Select Ethernet.
7. Select Change adapter options.
A new window will show Network Connections (Image 3)
8. Select Ethernet.
8
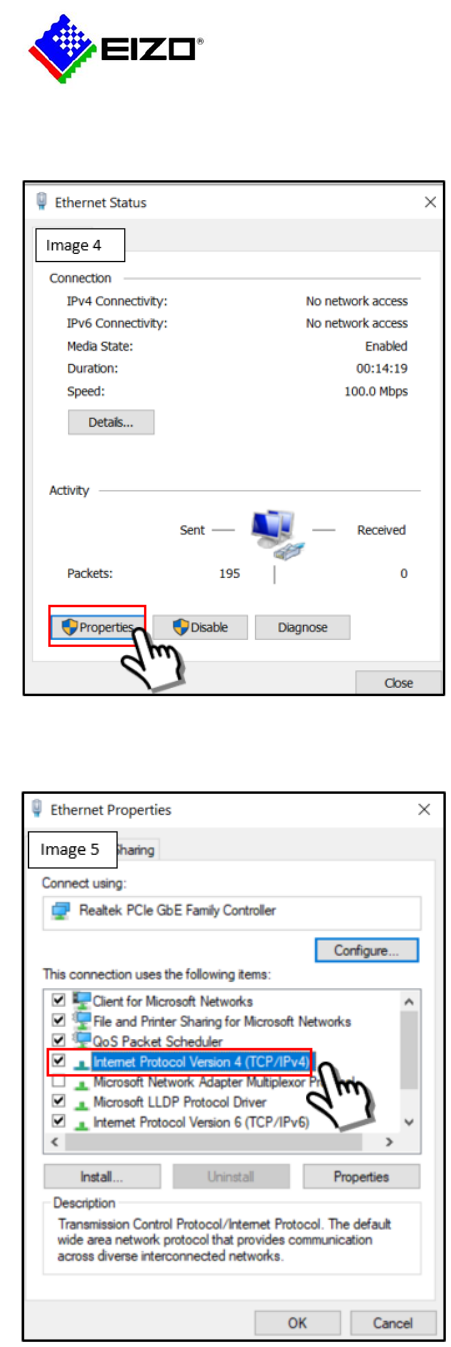
9. Select Properties. (Image 4)
10. Double Click on Internet Protocol Version 4. (Image 5)
9
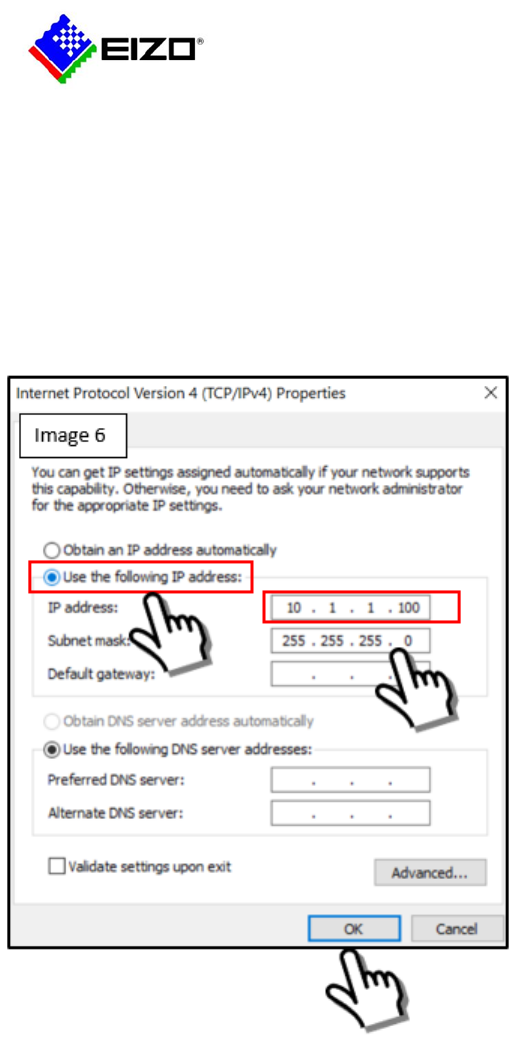
11. Select Use The following IP address. (Image 6)
12. Enter an IP address in the range of 10.1.1.XXX. The last number of the XXX can be from 0 to 255. In
the example shown 100 is used. If you have set the IP address of the LMM0802 to another IP range,
use the same IP range for the host PC.
13. Enter the subnet mask 255.255.255.0
14. Confirm setting by selecting OK.
10
Trouble Shooting
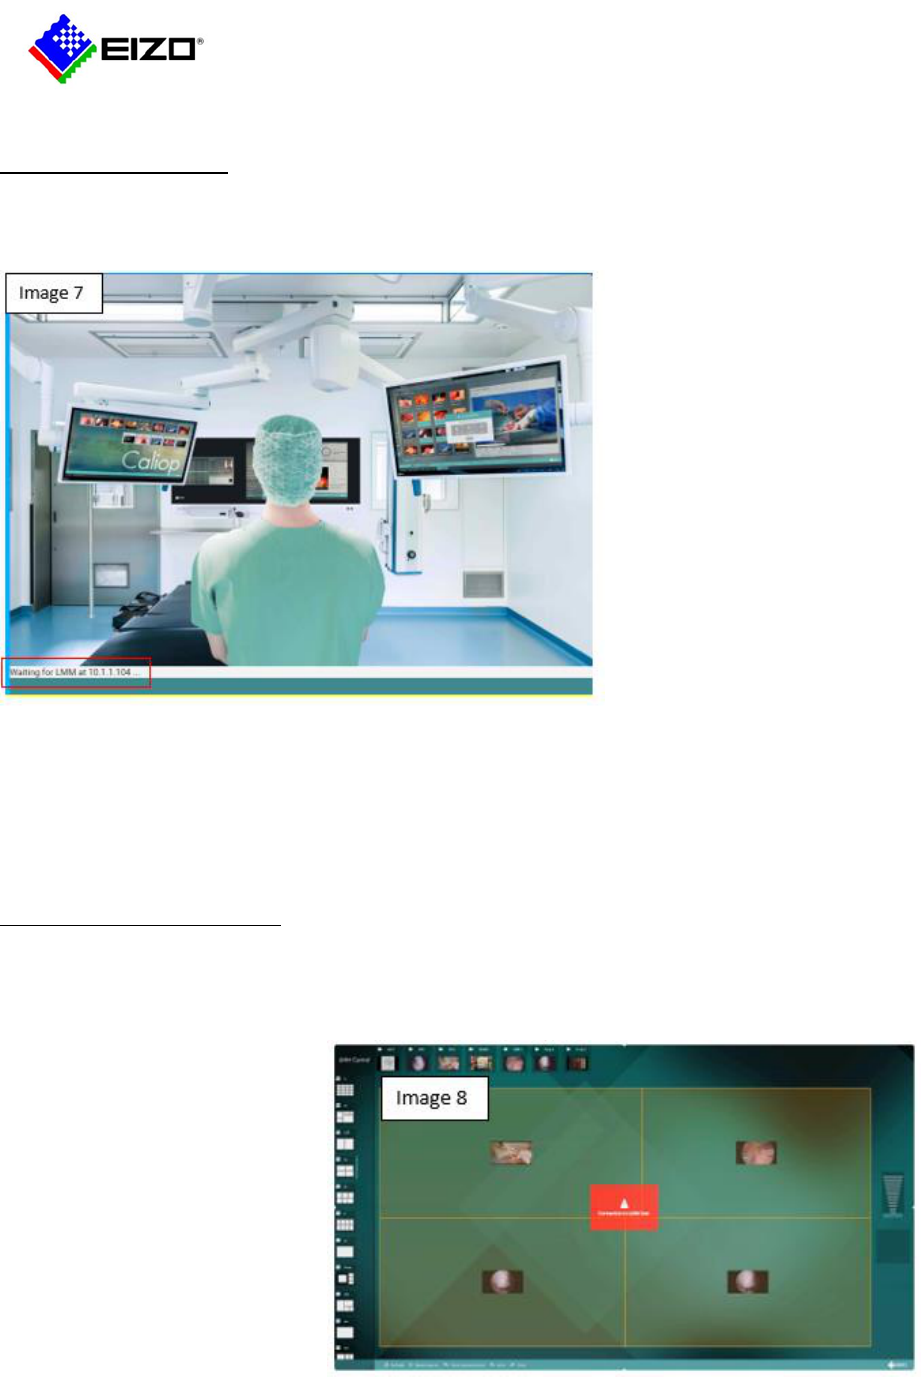
If the message “Waiting for the LMM at 10.1.1.104” remains on the screen with no further action the
LMM0802 is not communicating via the network. (Image 7)
1. Check the host computer and the LMM0802 have the same physical connection and share the same
IP address range.
2. To change the host IP address on LMM Control, restart the LMM control and hold the shift key. This
will allow the program to be reset with a new IP address at startup.
LMM Control Connection error
If the network connection between the host PC and the LMM0802 is lost the application will show an
error message in the middle of the screen. (Image 8)
Check the network cabling and
confirm if the IP addresses are
within the same network range.
The fallback IP address can also be
used 169.254.213.144. The host
PC will need to be reset to the
same IP range 169.254.213.XXX.
